
Creating multiple bonding interfaces in Ubuntu 14.04 LTS
Hi,
I wanted to share some learnings about bonding configuration which I could not find elsewhere.
„Bonding, also called port trunking or link aggregation means combining several network interfaces (NICs) to a single link, providing either high-availability, load-balancing, maximum throughput, or a combination of these.“ [1]
Bonding is an essential technology for highly available Linux systems. Thankfully all major distributions support bonding in some way. In Ubuntu you can easily create a bonding interface in /etc/network/interfaces. But this is only supported for a single interface.
What if you need bond0 and bond1 or even more independent bonding interfaces, maybe with different modes of operation?
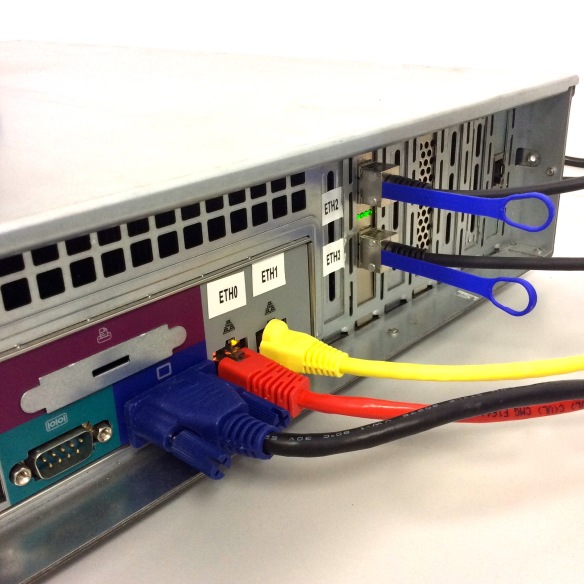
We currently introduce Ceph in our datacenter so I wanted two logical interfaces (for the Public and Cluster network) with a primary 10GBit primary and a 1 GBit backup physical interface.
I found many recipes which relied on modprobe. But in order to create multiple bonding interfaces the bonding module needs to be loaded into the kernel several times, e.g.:
modprobe bonding -o bond0 mode=active-backup miimon=100 primary=eth2 max_bonds=2
modprobe bonding -o bond1 mode=active-backup miimon=100 primary=eth3 max_bonds=2
This method however doesn’t work with Ubuntu 14.04, because modprobe is now kmod and -o is no longer supported.
The solution is to use the Sysfs-Interface of the bonding module and to create and configure the bonding interfaces yourself during the upstart process:
- you must not load the bonding module in /etc/modules because this immediately triggers the networking configuration, but you cannot configure bonding once the interface is up
- Use a custom Upstart Configuration to create the bonding interfaces manually (see /etc/init/bonding.conf below)
- use a script to create bonding interfaces (see listing below)
- now you can configure the interfaces and enslave physical interfaces in /etc/network/interfaces in the usual way
Good luck and may the uptime be with you,
Christian
/etc/init/bonding.conf
# bonding interfaces
description    "bonding interfaces"
start on (startup
   and started udev)
# stop on runlevel [!2345]
umask 022
script
   /usr/local/tools/create_bond_interface.sh -v -i bond0 -m 1 -p eth2
   /usr/local/tools/create_bond_interface.sh -v -i bond1 -m 1 -p eth3
end script
create_bond_interface.sh:
#! /bin/bash
VERBOSE=0
INTERFACE=bond0
MODE=1
PRIMARY=eth0
PROGRAMNAME=$0
usage () {
   echo "Usage: $PROGRAMNAME [-v] [-h] [-i INTERFACE] [-m MODE] [-p PRIMARY]"
   echo
   echo "   -v           be verbose"
   echo "   -h           this help"
   echo "   -i INTERFACE create bonding Interface (default: bond0)"
   echo "   -m MODE      bonding mode"
   echo "   -p PRIMARY   only Mode 1: Primary Interface"
   exit 1
}
while getopts ":hvi:m:p:" opt; do
   case $opt in
      h)
         usage
         ;;
      v)
         VERBOSE=1
         ;;
      i)
         INTERFACE=$OPTARG
         ;;
      m)
         MODE=$OPTARG
         ;;
      p)
         PRIMARY=$OPTARG
         ;;
      \?)
         echo "Invalid option: -$OPTARG" >&2
         usage >&2
         exit 1
         ;;
      :)
         echo "Option -$OPTARG requires an argument." >&2
         exit 1
         ;;
   esac
done
# load bonding module
modprobe bonding
# create bonding interface if it doesn't exist
EXISTING_BONDS=`cat /sys/class/net/bonding_masters`
echo " $EXISTING_BONDS " | grep " $INTERFACE "  >/dev/null
if [ $? -gt 0 ] ; then
   echo "+$INTERFACE" >/sys/class/net/bonding_masters
fi
# check if interface exist now
if [ -d /sys/class/net/$INTERFACE ]; then
   echo $MODE >/sys/class/net/$INTERFACE/bonding/mode
   echo 100 >/sys/class/net/$INTERFACE/bonding/miimon
   if [ ! _$PRIMARY == _ ]; then
      echo $PRIMARY >/sys/class/net/$INTERFACE/bonding/primary
   fi
else
   echo "Creation of Interface $INTERFACE failed"
   exit 1
fi
if [ $VERBOSE -gt 0 ]; then
   echo -n "Bond Interfaces:    "
   cat /sys/class/net/bonding_masters
   echo    "Interface created:  $INTERFACE"
   echo -n "Bonding mode:       "
   cat /sys/class/net/$INTERFACE/bonding/mode
   echo
   cat /proc/net/bonding/$INTERFACE
fi
ifconfig $INTERFACE up
exit 0
Example /etc/network/interfaces:
# This file describes the network interfaces available on your system
# and how to activate them. For more information, see interfaces(5).
# The loopback network interface
auto lo
iface lo inet loopback
auto bond0
iface bond0 inet static
   address AA.BB.CC.DD
   netmask 255.255.255.0
   gateway AA.BB.CC.XX
   dns-search MY.DOMAIN
   dns-nameservers NAMESERVERS
   pre-up ifenslave bond0 eth0 eth2
   post-down ifenslave -d bond0 eth0 eth2
auto bond1
iface bond1 inet static
   address WW.XX.YY.ZZ
   netmask 255.255.255.0
   pre-up ifenslave bond1 eth1 eth3
   post-down ifenslave -d bond1 eth1 eth3
Troubleshooting
* Status via /proc-Filesystem. Erfolgreiches Interface z.B.:
root@s3cn1:~# cat /proc/net/bonding/bond0
Ethernet Channel Bonding Driver: v3.7.1 (April 27, 2011)
Bonding Mode: fault-tolerance (active-backup)
Primary Slave: eth2 (primary_reselect always)
Currently Active Slave: eth2
MII Status: up
MII Polling Interval (ms): 100
Up Delay (ms): 0
Down Delay (ms): 0
Slave Interface: eth0
MII Status: up
Speed: 1000 Mbps
Duplex: full
Link Failure Count: 0
Permanent HW addr: 00:30:48:64:db:b2
Slave queue ID: 0
Slave Interface: eth2
MII Status: up
Speed: 10000 Mbps
Duplex: full
Link Failure Count: 0
Permanent HW addr: f4:52:14:3d:fe:70
Slave queue ID: 0
* Upstart-Logfile:
root@s3cn1:~# cat /var/log/upstart/bonding.log
----------------------------------------------------
Bond Interfaces:    bond0
Interface created:  bond0
Bonding mode:       active-backup 1
Ethernet Channel Bonding Driver: v3.7.1 (April 27, 2011)
Bonding Mode: fault-tolerance (active-backup)
Primary Slave: None
Currently Active Slave: None
MII Status: down
MII Polling Interval (ms): 100
Up Delay (ms): 0
Down Delay (ms): 0
----------------------------------------------------
Bond Interfaces:    bond0 bond1
Interface created:  bond1
Bonding mode:       active-backup 1
Ethernet Channel Bonding Driver: v3.7.1 (April 27, 2011)
Bonding Mode: fault-tolerance (active-backup)
Primary Slave: None
Currently Active Slave: None
MII Status: down
MII Polling Interval (ms): 100
Up Delay (ms): 0
Down Delay (ms): 0
Comments (5)
Are you still doing it this way? ive found bonding in 14.04 to be quite frustrating.
Yes it is. We still use that configuration, but only for systems where Ethernet Redundancy ist really nessecary.
Do you know a dirstribution that offers bonding for multiple separate networks in a easier manner?
Actually, as it described in documentation, it configurate QUITE easier. It’s ALL, what you need to set up bonding (live example from one of my servers):
[code]# The primary network interface
auto em1
iface em1 inet static
address 192.168.254.13/24
#gateway 192.168.254.88
# dns-* options are implemented by the resolvconf package, if installed
dns-nameservers 192.168.254.88
dns-search smartspb.net
auto p1p1
iface p1p1 inet manual
pre-up (/sbin/ethtool -s $IFACE speed 10000 duplex full autoneg off; \
/sbin/ethtool -K $IFACE tso off gso off gro off ntuple on; \
/sbin/ethtool -G $IFACE rx 4096 tx 4096; \
/sbin/ethtool -C $IFACE rx-usecs 100; \
/sbin/ifconfig $IFACE txqueuelen 10000) || echo "Failed to set ethtool $IFACE"
up ip link set dev $IFACE up || echo "Failed up "
bond-master bond0
auto p1p2
iface p1p2 inet manual
pre-up (/sbin/ethtool -s $IFACE speed 10000 duplex full autoneg off; \
/sbin/ethtool -K $IFACE tso off gso off gro off ntuple on; \
/sbin/ethtool -G $IFACE rx 4096 tx 4096; \
/sbin/ethtool -C $IFACE rx-usecs 100; \
/sbin/ifconfig $IFACE txqueuelen 10000) || echo "Failed to set ethtool $IFACE"
up ip link set dev $IFACE up || echo "Failed up "
bond-master bond0
auto bond0
iface bond0 inet manual
pre-up (ip link set dev p1p1 up || echo "Failed); (ip link set dev p1p2 up|| echo "Failed);
bond-mode 802.3ad
bond_xmit_hash_policy layer3+4
bond-slaves p1p1 p1p2
# bond-primary p1p1 p1p2
bond-lacp-rate fast
bond-miimon 100
bond-downdelay 5000
bond-updelay 5000
post-up ip link set dev bond0 up || echo "Failed post-up bond0"; \
auto bond0.3928
iface bond0.3928 inet static
address 109.71.176.5/31
gateway 109.71.176.4
dns-nameservers 217.119.16.75 217.119.16.67
dns-search smartspb.net vs.smartspb.net smarthome.spb.ru
auto bond0.3930
iface bond0.3930 inet static
address 10.78.76.25/31
dns-nameservers 10.78.77.67 10.78.77.75
dns-search smartspb.net vs.smartspb.net smarthome.spb.ru
post-up ip route add 10.0.0.0/8 via 10.78.76.24 || echo "Failed adding route";
[/code]
Thanks vor your configuration example. Creating bond0 in /etc/network/interfaces is documented.
But did you manage to create more than one bondX-Device?
I found, that once bond0 is up, I could not confugre bond1 (set bonding mode, add slaves). That’s why i did it earlier in the boot process.
The reason that the bonding module only supports one bonding interface is because it defaults to only one. By changing or creating /etc/modprobe.d/bonding.conf and adding the following line:
options bonding max_bonds=2
the bonding module will support two interfaces (you can adjust the number as wanted).
The above configuration will automatically create two bonds (bond0 & bond1) in /sys/class/net when the module is loaded (boot time). You can then just normally configure the whole bonding config in /etc/network/interfaces
See also: http://catdamnit.net/?p=89